What tool should I get next for woodworking?

Alan Chenkin, Owned a Cabinet shop for 10 years, and was an AWI Member.
The real question is , what are you going to build?
That answer will point you to the tools you need.
It will also determine if you need a set of everyday tools (screw guns, chisels, nailsets) or occasional tools (lock sets, hand or power planes,biscuit joinerbandsaw). I use my chisels all the time, but only use my thickness planer about once every 2 years (thank goodness we can get dimension lumber off the shelf!). 
The most practical item for you may be a book on woodworking and layout. My dad was a shop teacher, and he gave me a copy of the Feirer book, and I learn from it all the time. To me, it is as valuable as any tool.
Since most public schools do not teach woodworking or have industrial arts programs, books like these are essential to building basic skills in woodworking.  The basics in layout and construction can save you hours of time, and prevent you from innocently using a lathe to mill a toothpick.
Best wishes for success with all your future projects!
Thank you for reading my blog!  Feel free to share!

What is the Best home-made woodworking machine?

Alan Chenkin, Owned a cabinet shop for 10 years, is an avid woodworker.
The best woodworking machine is one that gets the job done – Safely! If it has the amusing properties of a Rube Goldberg invention, even better!
Should you ever need to build your own woodworkign machine, proceed safely and carefully!  you may be dealing with sharp blades and fast spinning shafts!  
We are fortunate to live in a time where you can buy affordable, safe, and efficient machines for almost any purpose, and making your own tools and machinery is something we may not have to deal with!

Thank you for reading my blog!  Feel free to share!

How can I get super glue off the counter?

By Alan Chenkin, Uses glue all the time, for fun and woodworking projects

Lot Of 5 Elmers Krazy Glue Original Crazy Super Glue All Purpose Instant Repair
Krazy glue is an adhesive called Cyanoacrylate.  
Two techniques should be considered when you have Krazy glue on your counter;
First, try rubbing it off with nail polish remover (one that contains acetone).  Any rag may do, but microfiber ones are best (my personal experience).
Second, try using a light oil – WD-40 or cooking oil – and use a plastic spatula (not metal) to carefully scrape the super glue. The oil should lubricate the counter, and keep the spatula from scratching it. Don’t use a lot of force!  If the oil can get underneath the glue, this is worth a try:
Onyx Professional 100% Acetone Nail Polish Remover Removes Artificial Nails, Nail Polish, Gel Polish and Glitter Polish
Acetone is the key ingredient in most nail polish removers. You can also find acetone at your local hardware or paint store. Apply the solvent to a paper towel and place it on the stain until the glue has softened. The softened glue can then be removed with a clean dry towel.[1]
WD-40 Multi-Use Product Spray with Smart Straw, 8 oz. (Pack of 1)
WD-40 is a “Goo Remover” and can sometimes get under the superglue and lift it.
 
Remember to clean and polish the counter after you remove the glue.   If it is a Laminate counter, try “Countertop Magic“.  Krazy glue has trouble sticking to polished, waxed, or oiled surfaces.
Always use Krazy glue with care, and (next time) use Krazy glue with old newspapers or a cardboard carton underneath the work!  
Good Luck with Krazy glue, remember it does a real good job sticking fingers together, so be extra careful! 
Thanks for reading my blog!  Feel free to share.
Footnotes

What is the best 14″ bandsaw for home use?

Alan Chenkin, Owned a Cabinet shop for 10 years, and was an AWI Member.

The best bandsaws have professional features.
Look for ball bearing roller guides for the saw blade, vs. steel blocks on the cheaper bandsaws. The saw should also have an easy to change blade system, and dust extraction.
Look at this from the web:
Two Bandsaws I like:
My favorite was an old Delta, rusty, noisy, cantankerous – but great to learn on. Sometimes you can find one used in the classifieds or at a yard sale. Unless it is the bargain of a lifetime, most people only buy one or two bandsaws in their lives; it’s a major shop purchase (like a jointer or table saw) and should not be a hasty decision.
Read up:
If your shop is small, you can mount the saw on wheels, so you can store it out of the way.  You can get a wheel kit like this one: 
Adjustable Mobile Base HTC2000 for Power Tools by HTC
Your bandsaw is one of the most useful tools in the shop. It can cut thicker Stock than your table saw, and do fancy scroll-work. Make sure you have the right blades and it will be a valued addition to your work shop.
Thanks for reading my blog!  Feel free to share.

What is an alternative for a hot glue gun?

By Alan Chenkin, Uses glue all the time, for fun and woodworking projects

You can’t beat a Hot Glue Gun for convenience and utility, but sometimes you need a backup plan.  It takes time for the glue gun to heat up, it has to be plugged in (unless it’s a cordless glue gun), you might be out of glue, or it is lost or broken.  I have lined up some good choices for that backup plan!
These are glue dots. used in craft work, gift baskets, balloon art, and more.Amazon.com: Glue Dots .5 Removable Dot Sheets Value Pack-600 Clear Dots
Works well when you can’t use heat, or have no access to electricity (for a glue gun).
If you need something more substantial, try
There are also spray adhesives, for temporary or permanent attaching.
If you have any specifics, I have other ideas.  Feel free to contact me about Contact Cement and Crazy Glue!
Thanks for reading my blog!  Feel free to share.

What parameters should I consider to make sure about the high quality of power tools?

By Alan Chenkin, Trained as a Machinist/Mechanic in the NYC schools, Life long Mr. Fixit
When you buy power tools, with all the choices today, it is almost always better to purchase a well-made tool. It will perform better and usually last longer.
If we look at drills, some are inexpensive “homeowner grade”, have chucks that wobble, and may be uncomfortable to use. Others are sleek, well machined, and powerful. Both grades of tools will do the job, but the better grade tool will give you better results over time.  Always try to use the tool before you buy it, to make sure it is good for your purposes.
In addition to the look and feel, read the reviews. Most people will give an honest opinion of their equipment, and it gives you a basis to go on. Many sites have reviews of tools, comparing several brands and picking a “best of” choice.
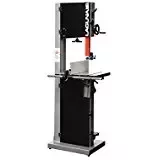
In the case of table saws, there are many inexpensive choices, and the specs are published and well known; It is as important to set up the saw properly (link to Amazon Books) and use the correct blade for the work as the make and model of saw. Of course, if you start with a better saw – Altendorf, Martin, Jet, Powermatic, Grizzly, etc (link to Amazon tools)., And you set it up properly, it will be a wonderfully good machine to use.
There are other considerations as well. With battery tools, you may want to stay with one brand – This limits you to that line of tool, or you may have to have multiple brands of batteries and chargers on hand. Here you can pick the best compromise between quality, function, and standardization.  This is a list of Battery tool kits from Amazon.  Kits give you the best value, and multiple tools.
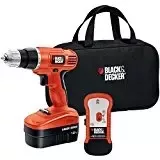
This is a Black and Decker 18 Volt drill kit. This kit has a good buy for a homeowner or casual user for about $80 USD. IF you need tools, and it’s not your day job, this is a good buy.
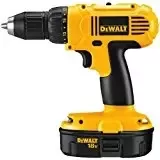
Here is a DeWalt 18 volt drill for $122. You will see tradesman and professionals using this drill, which is heavier than the Black and Decker, has a more powerful motor, impact resistant plastic case and fast charger. 
Both of these drills do the same operations, but if you place them both by side, you will recognize the feel of the “better” tool, with its higher price tag, better bearings and power.
If you are presented with choices, you can always ask/write me directly, or send me some tools to test for you! (hope you find this funny, but I would graciously test any tools given and freely blog about it)! (shameless self promotion).
Check the return policy for your tools, so you can return them to the store if they are not the quality you are expecting. Tool purchases are not everyday occurrences, so take your time and make sure you are getting a good product for your money. Also check the warranty, so if it wears out prematurely, you have recourse.
Thanks for reading my Blog – Feel free to share! – Alan

How can I change a lightbulb in the ceiling without damaging it?

Alan Chenkin, Handyman and designated lightbulb changer.

A ceiling light bulb is sometimes in a “High-hat”, or “recessed” light fixture. Unless you have a small hand, (and are standing on a ladder) removing it can be tricky, unless you have one of these:
Or one of these kits:
you still must turn off the power switch, and make sure the bulb is cool. And take care! you are working overhead with a fragile bulb that can potentially come crashing to the floor and break.
I hope my answer helps, especially if you have recessed ceiling lights in a high ceiling!!
Thank you for reading my blog!

Why does wood shrink?

Wood shrinks in width. This is because it looses moisture (water) as it dries.Moisture content in lumber for framing houses is usually 19%, and furniture grade lumber is dried to 6–8% moisture content.

To detect the moisture in wood, you need one of these meters:
Enjoy your woodworking projects!!
Thank you for reading my blog!

Can I sand off one layer of varnish on a floor with a hand sander?

Alan Chenkin, Lifelong Carpenter/Cabinetmaker, owned an AWI certified shop for 10 years.

With fine sandpaper you can even-out the finish, without going all the way down to the bare wood.  You can also apply a layer of finish over the sanded area I would test an inconspicuous place (inside a closet, as an example) with 120 or 150 grit sandpaper, using an orbital sander. Use a 1/2 sheet sander like this
Belt sanders are very aggressive, and these orbital sanders are more forgiving.  This is especially true when sanding wood with a very noticeable grain.  If the existing finish is not worn out, you can use fine grit #220 sandpaper to scuff it so it will take a new finish well.  If you have to take more of the finish off, start with the coarser #100 or  #120 grit sandpaper to remove any heavy scratches.
I once sanded an entire 8×10 room with two of these, a lot of fresh sandpaper, some serious dust masks, and lots of patience. Not always the best way, but it worked – even though my hands vibrated on their own for almost 2 days afterwards!
If the test worked out, consider renting a large pad sander. Please wear dust protection, exhaust the dust with a window fan, and keep a shop vac handy to pick up the dust. Be careful when you clean the gaps, as floors do move – and will compress and expand any filler you apply.
Best of luck with your project! – Alan

How can I screw into a particle board after I have removed the screw?

Alan Chenkin, Lifelong Carpenter/Cabinetmaker, owned an AWI certified shop for 10 years.

Image result for wood cabinet loose screws

This issue with IKEA products and most inexpensive RTA (Ready To Assemble) cabinets almost universal.  Screws do not hold well in particle board, and cabinets can get loose, or come apart.  My solution is simple and can be done by almost any person with a little knowledge and desire to fix their cabinets.

Here is one of my solutions, which is often the quickest and most practical (IMHO), and can solve the reassembly problem without waiting for glue to dry.  In many cases, a squirt of Titebond glue and a toothpick broken off in the screw hole will make the screw form new threads in the wood when you put it back in.
Image result for damaged screw hole
This is an ANGLE BRACKET, also known as an “ELL” bracket. It is even stronger when combined with the toothpick and glue fix, and can give an Ikea cabinet a new lease on life.
This will keep an Ikea cabinet box together. I usually use 2 or three on each corner. One caveat – use these screws instead of any that come with the bracket:
Most of the boards are about 5/8″ thick, so 1/2″ screws don’t break out the other side.
You can get these parts at any hardware or big-box store. Most of the time they do the trick.
There are lots of different types of angle brackets. Here is a typical flange type (it’s wider):
Here is a typical application:
Angle brackets can be used on any kind of casework, like drawers, kitchen cabinets, and furniture.  Angle brackets come in many sizes, I like the smaller ones for fixing most Ikea products. I like the ones that have 2 screws on each side, because more screws equal more holding power.  They are not overly large, and are easy to install with a power screw gun, without pre-drilling.
Thanks for reading and feel free to share this!

All rights reserved by Alan Chenkin & Primrose Path LLC.  Remember to give credit to the author and any cited works. If you enjoyed this blog, please feel free to share.  Links may be promoted to sponsor sites, but are relevant to the topic. 

Also Check out my other sites: