If your log is green wood (freshly cut, or “wet”), you will need a bandsaw with a throat larger than 10″ (and capable of dealing with the irregularity in a long 10″ diameter log).
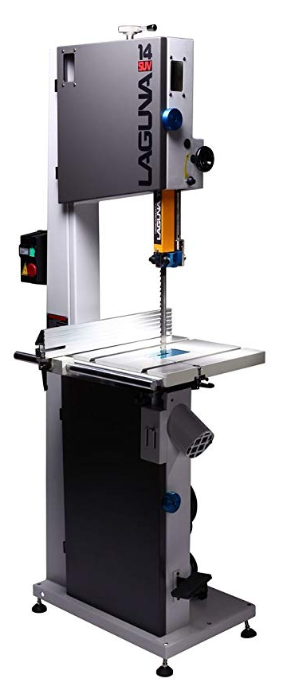
I would recommend (on the modest side) a 14″ – 18″ bandsaw like this one by Laguna Tools:
Then you would need a sled, or carriage to transport the log through the bandsaw.
This is a homemade log cutting jig for short logs: Super Simple Band Saw Log Sled, from Instructables.
If your log is long, you will need to make a support or rails so it will slide evenly through the saw without binging or cutting at an angle or curve.
If the log is green, you have to allow for drying and shrinkage, so you may cut the pieces 1/2′ thick and then use a thickness planer to get it to the final 1/4″ thickness, after allowing the wood to dry to dry. (8–10% moisture content before planing). This is some good information on how to dry wood; Cutting And Drying Logs Into Boards – Woodworkers guild of America.
after the wood is dried to 6-10% moisture content, you will need a thickness planer. Thickness Planers are available from big box stores, Amazon, and eBay.
After the wood is sized to thickness, you will need a jointer and a table saw to clean up a long edge and square the board.
At this point your 1/4″ S4S (surfaced 4 sides) boards are ready for fabrication.
Some caveats: These are powerful machines, and caution must be exercised with each machining operation. Use protective gear like safety glasses, ear protection, dust protection, and gloves. Make sure you have all the machines setup and working correctly, and make test passes before machining all the wood, so the slabs will be uniform and true. (parallel sides).
Depending on your specific application, you may need a larger bandsaw, a tablesaw, a jointer, and more – especially if you make the jigs and supporting tables yourself.
Thank you for reading, and Have fun making your own boards from logs!
Disclaimer: I am a trained woodworker and have my own blog, The Chenkin Workshop


 If your logs are larger then 10″ and heavy, your best solution is to purchase a small sawmill. This book is available on Amazon, and worth reading, so that you understand the principles and capabilities of a portable saw mill.